When you’re building websites, page builders are great tools! Instead of using HTML and CSS to format your page designs, you can use a visual editor to take your design to new levels. In our experience with WordPress website designs, Elementor is one of the best page builders out there!
Install Elementor on Your WordPress Website
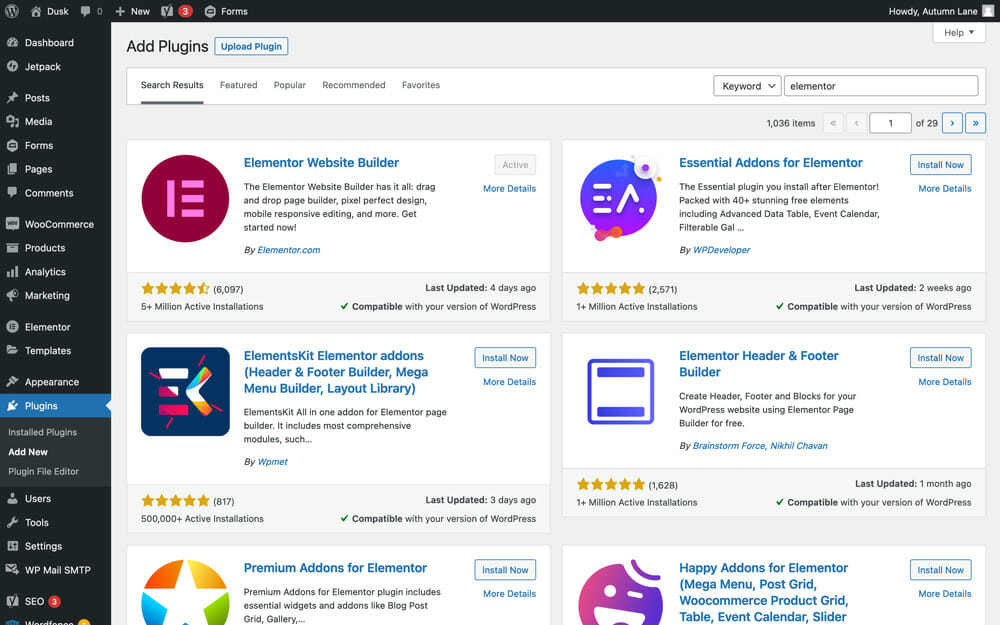
To install Elementor (free version), log into your WordPress site and navigate to Plugins > Add New from your dashboard. Here, search ‘Elementor’ and install the plugin!
If you’ve purchased the Elementor Pro Plugin, install the plugin in Plugins > Add New > Upload Plugin, then navigate to Elementor > License and put your purchased Elementor license in the settings, then save.
Pro tip: Elementor Pro is well worth the investment for web designers. In addition to providing a lot more options right off the shelf, it also unlocks the ability to insert custom CSS for a specific page without needing to use the customizer or stylesheet.
Changing Elementor's Default Settings on the Dashboard
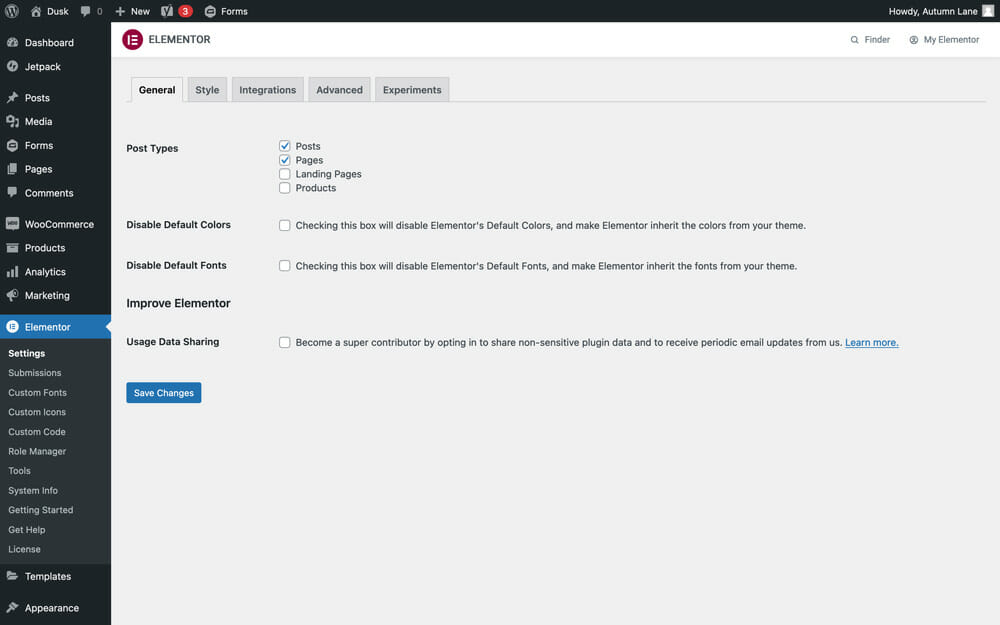
From your WordPress dashboard, you can edit your page builder’s default settings! If you want to remove Elementor’s default text colors and/or fonts in order to use your website theme’s fonts and colors, you can do this by navigating to Elementor > Settings in your dashboard. If you don’t disable this, you’ll probably wonder why your heading elements are baby blue on your website.
Once here, you can check:
Disable Default Colors – This will disable Elementor’s global colors in order to allow you to use your theme’s colors.
Disable Default Fonts – This will disable Elementor’s global fonts and allow you to use your theme’s fonts.
If you prefer to use Elementor to set your site’s global colors and fonts, you can edit Elementor’s global settings!
Updating the Global Site Settings for Uniformity
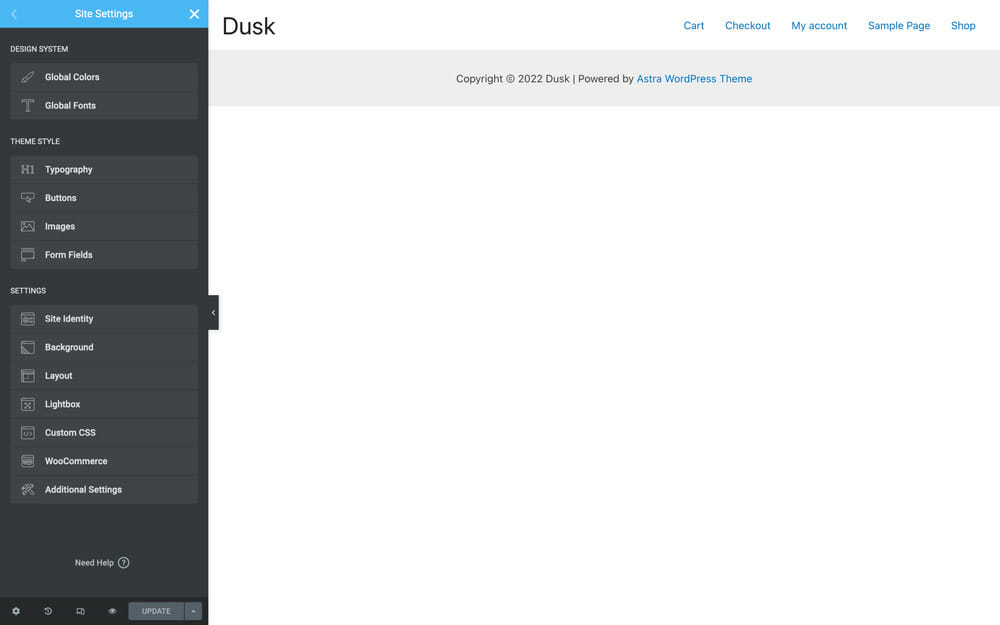
To edit the global styles of your Elementor editor, you can navigate to the Templates tab in the WordPress dashboard, click the ‘All’ option in order to make sure each Elementor template in the template library is displaying, find ‘Default Kit’, and click ‘Edit with Elementor’. This will load the Elementor Editor, where you will be able to view the editor’s global fonts, colors, and more!
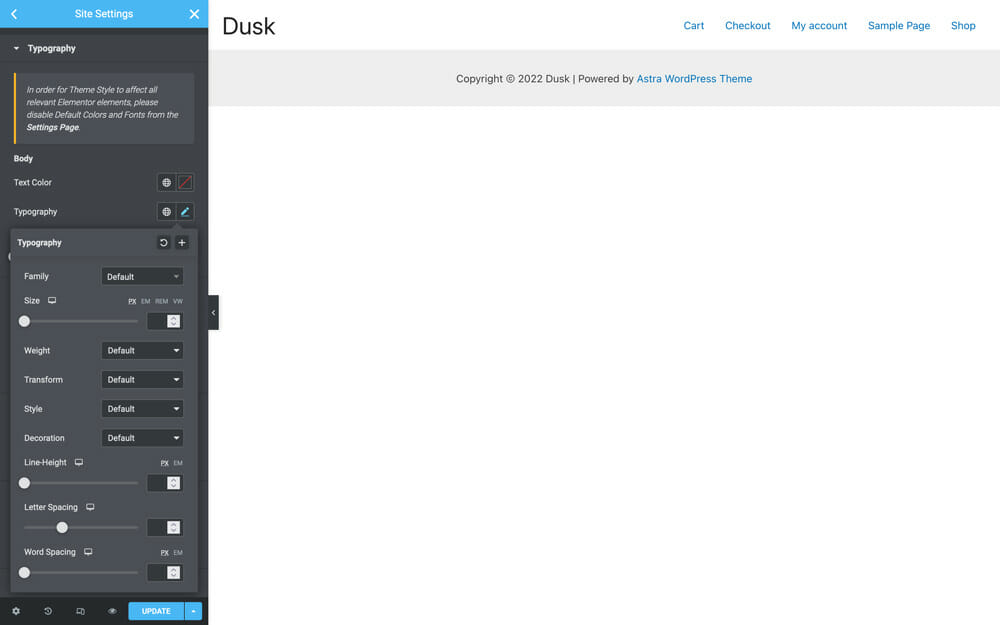
To edit any of the global settings, all you need to do is select the section in the editor, then adjust the settings that are in place. For example, if you would like to update your global typography, you can click on the ‘Typography’ tab, then edit the typography settings and color for each of the following tags: Body font, H1, H2, H3, H4, H5, and H6.
How to Use Elementor to Edit a Page
To edit a web page with Elementor, navigate to Pages in your WordPress dashboard, then click ‘edit’ beside the page that you would like to edit. Then, you will click ‘Edit with Elementor’ to load the Elementor page builder and edit your new page!
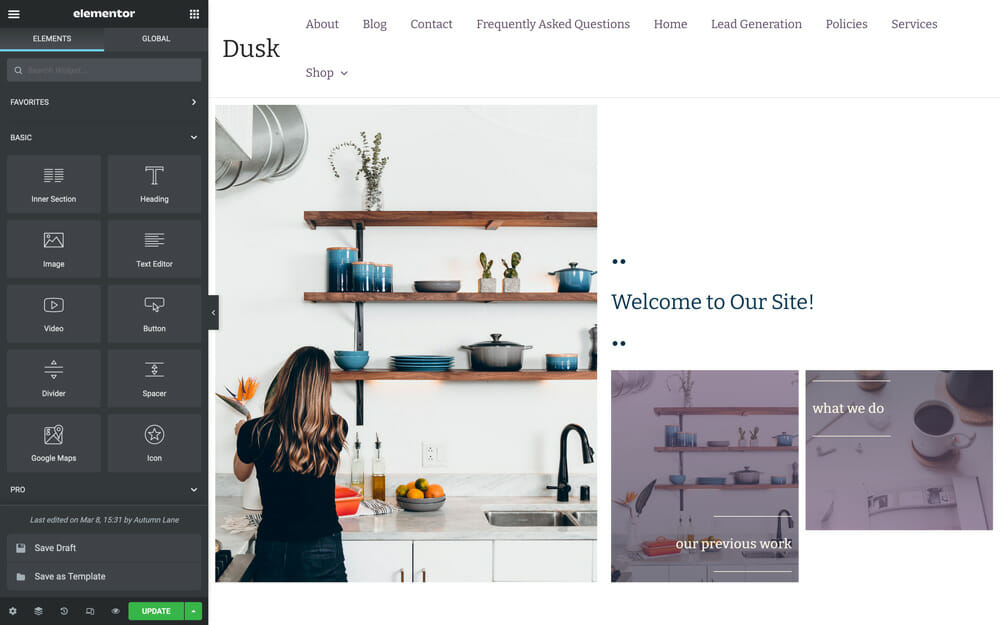
Draw the Reader's Eye With Text Layout
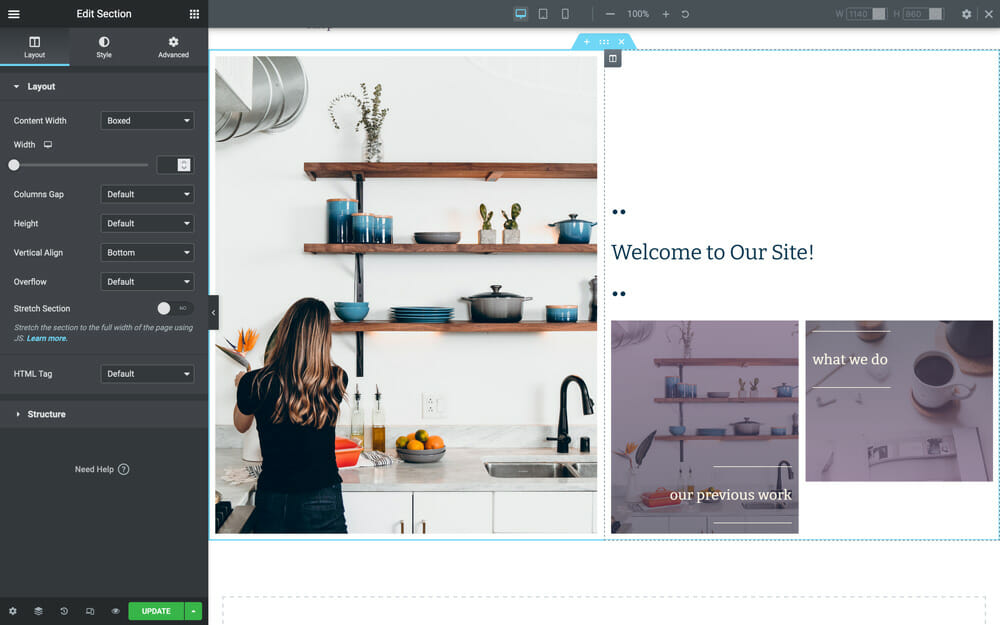
The layout of your text and your images is a huge part of engaging with the user of your website. There is no end to the number of layouts that you can use in your Elementor page builder to draw the reader’s eye and increase visual interest to make your site’s content easy and fun to read!
A layout like this can be achieved using a two-column section with an internal section (an element that can be dragged into place within Elementor) in the second column that uses background images on the columns with the widgets aligned to the bottom of the section. You can set the background images by selecting the inner element columns & clicking on Style in the left pane – you’ll see the ability to define a background, there.
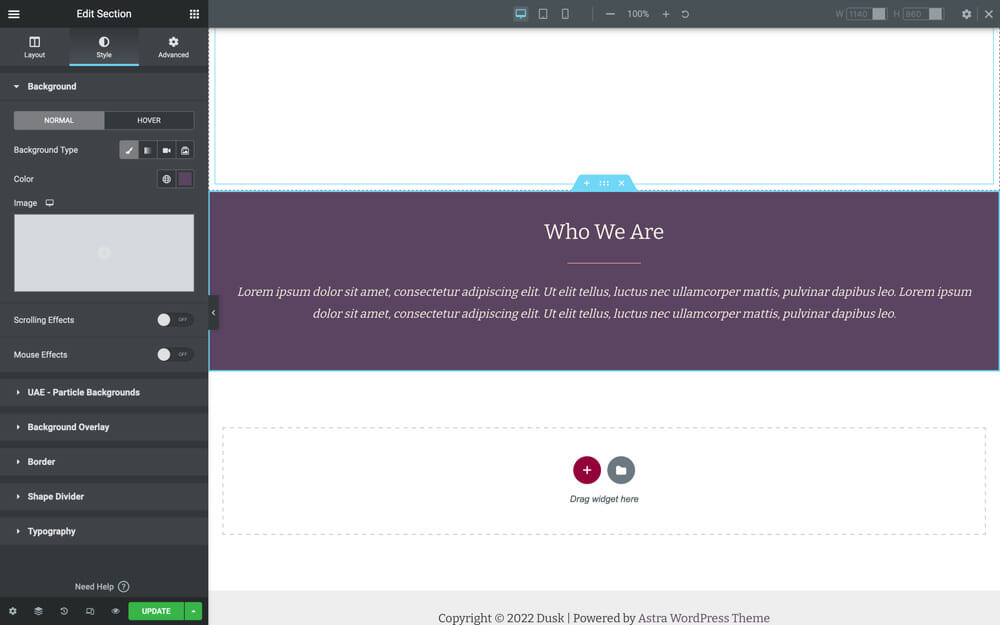
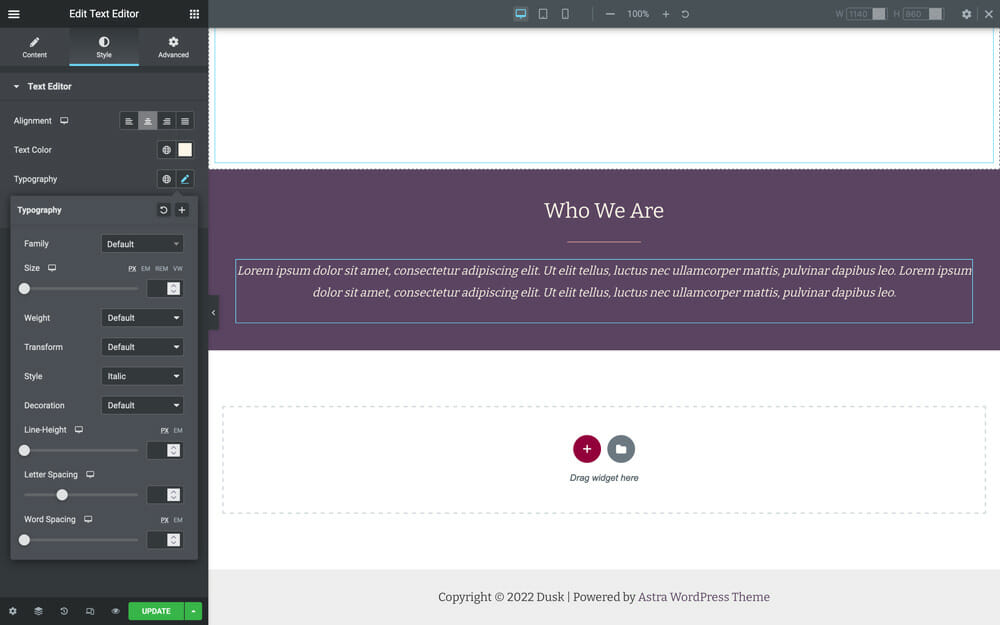
By using a stretched section with a background color, you can highlight a specific passage of text on your site, especially if you don’t need an image for this section! You’re able to stretch the section in the controls on the left under Layout.
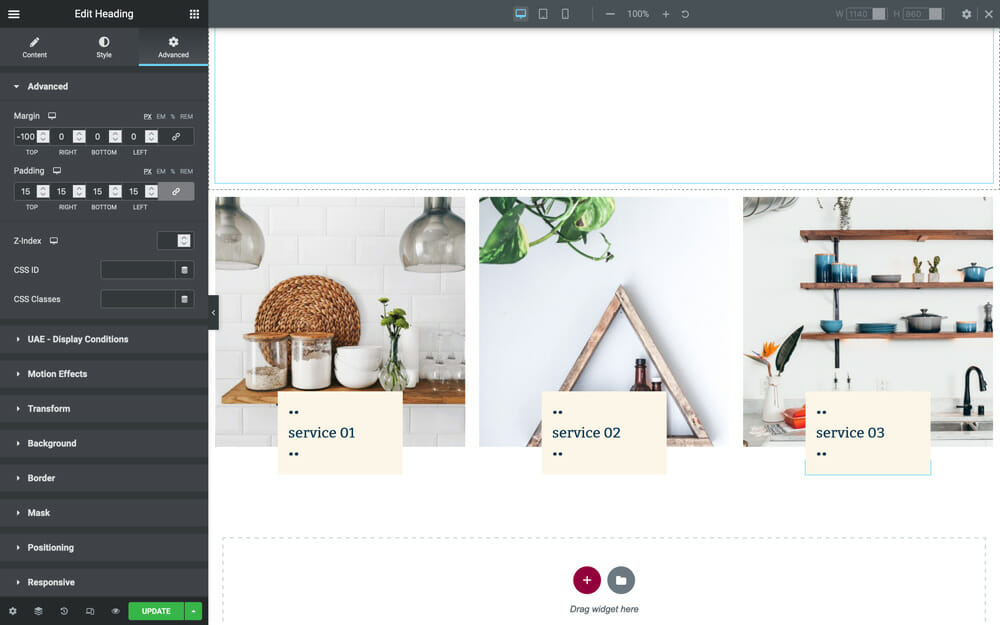
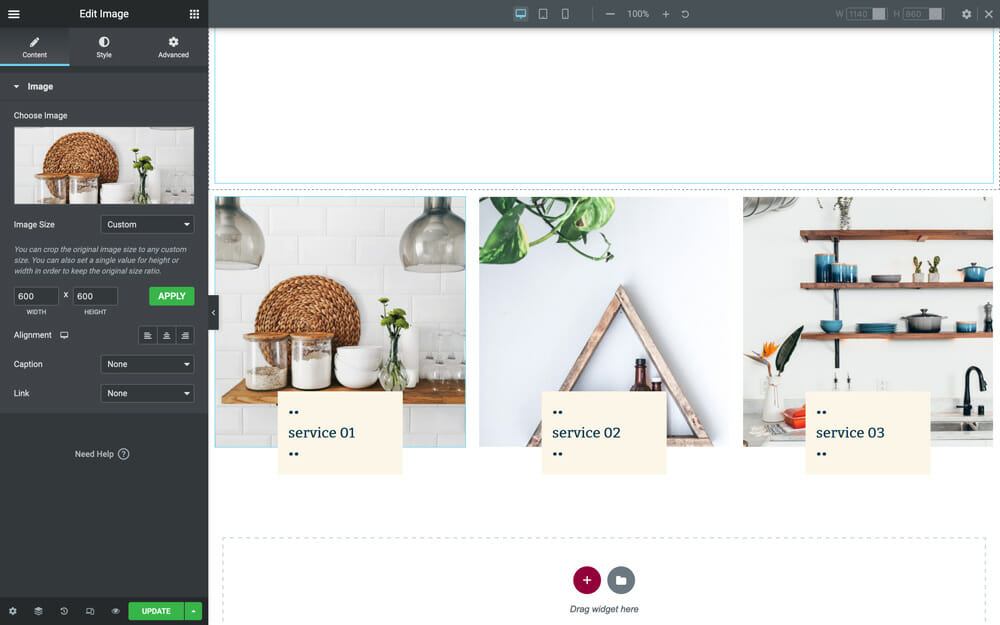
This layout can be created with a three-column layout that uses images and titles with negative margins, a small amount of padding, and a background color! You can control margins & padding for an element on the Advanced section of the controls in the left pane. Need to control margin or padding for only one side of an element? Click the chain link on these controls to make it so that you’re able to edit one side at a time.
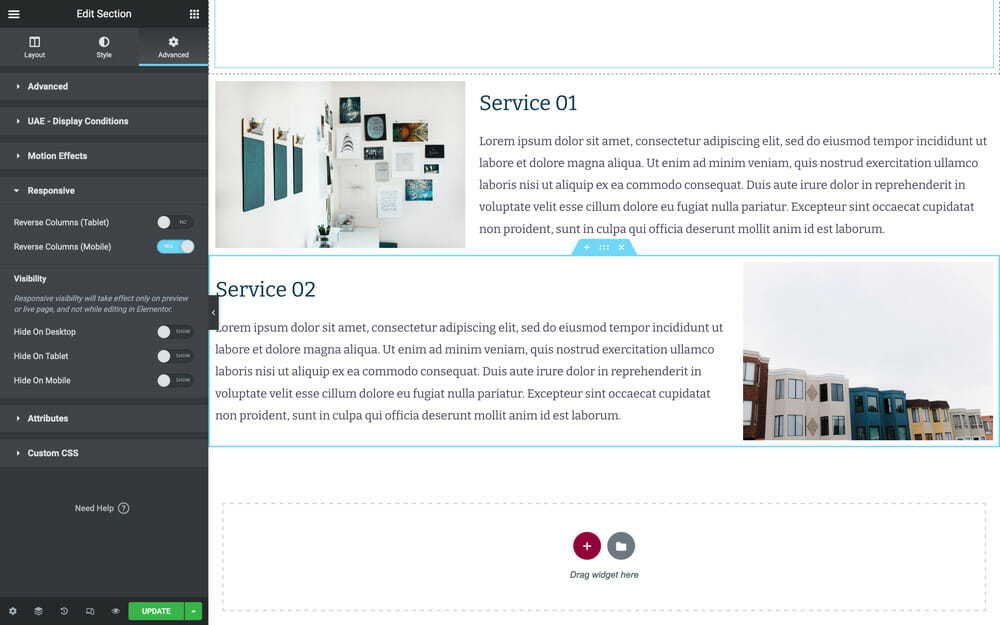
Alternating Text-image Image-text for Visual Interest
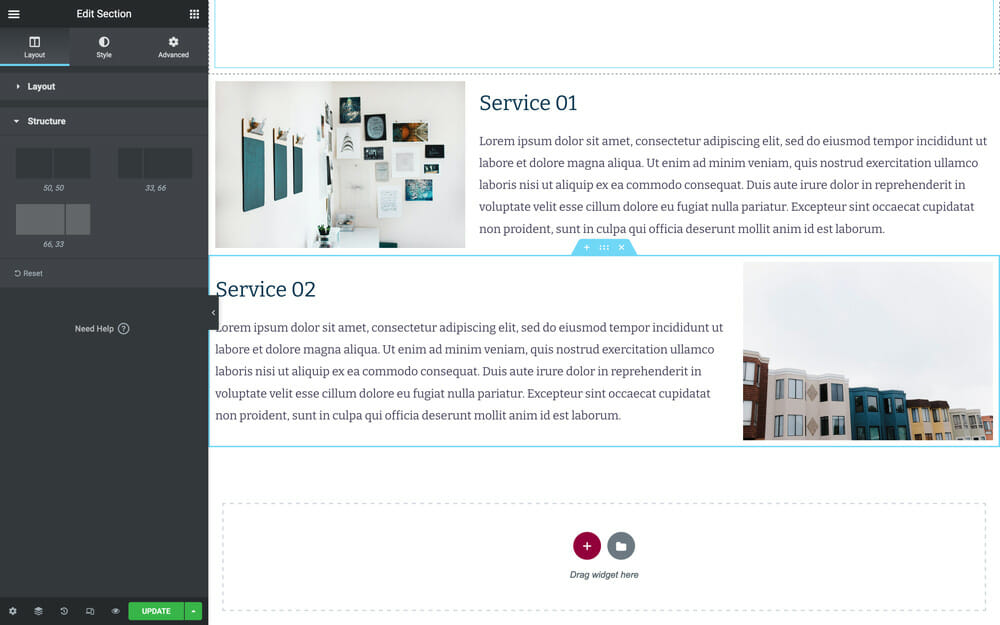
One of the best parts of working with the Elementor page builder is that it makes it super easy to add and utilize columns. When you’re first starting out with designing your site in Elementor, creating more involved text layouts to drive the user’s eye can be difficult to get right every time.
In this case, using a simple text-image / image-text layout can be super useful and a really great way to draw the user’s eye and interest them in your content!
Adjusting Image Styles
It’s likely that the images you have for your website will not have the same dimensions. Because of this, using your images in a visually pleasing manner can be difficult. Luckily, when you edit with Elementor, you can set the dimensions of your images! After placing an image widget on the page, you can select one of the preset sizes from the dropdown by the Image Size option or you can set custom dimensions with the ‘custom’ option and set your images to a specific size.
Adjusting Font Styles
Whenever you place a title element on the page, you can choose one of the preset sizes, such as small, medium, large, x-large, or xx-large! Using the style tab, you can also choose a custom color and even edit the typography to make the font italic, bold, underlined, and more for titles or a text editor!
How to Change the Font for Specific Elements, if a Unique Font Is Needed
Using the style tab, you can edit a text element’s font and style. When you click on the typography editor, you can choose a new font from the text dropdown, set a custom font size, and set custom font styles!
How to Adjust Margins/padding & Why That May Be Important for Responsive Design
Whenever you need to adjust the placement of an element in relation to other elements or increase spacing between elements, padding and margins can be your best friend! It’s important to not overuse them and to ensure that they are relatively uniform across similar elements and are set to look good on multiple display sizes.
To set your padding and margins, you can click on the element and navigate to Advanced features tab in the left-hand sidebar. In the ‘Advanced’ box at the top of this tab, you will see boxes to input your custom margins and padding!
For mobile and tablet displays, you can select the mobile size by clicking on the little icon next to ‘margins’/’padding’ and set the correct settings so that the sizing looks great on these display sizes as well!
How to Control Mobile Display Elements
Mobile display is a whole other world than desktop. While creating amazing websites, it’s important to take the different display sizes into account! Because the screen size is so drastically different, there may be elements that you don’t want to display on mobile sizes or columns that you will want to display in a different order. This is where your responsive design settings will come into play.
In the Advanced tab, navigate to the ‘Responsive’ settings and select whether you need columns reversed or if you need a widget to be hidden on desktop, tablet or mobile displays.
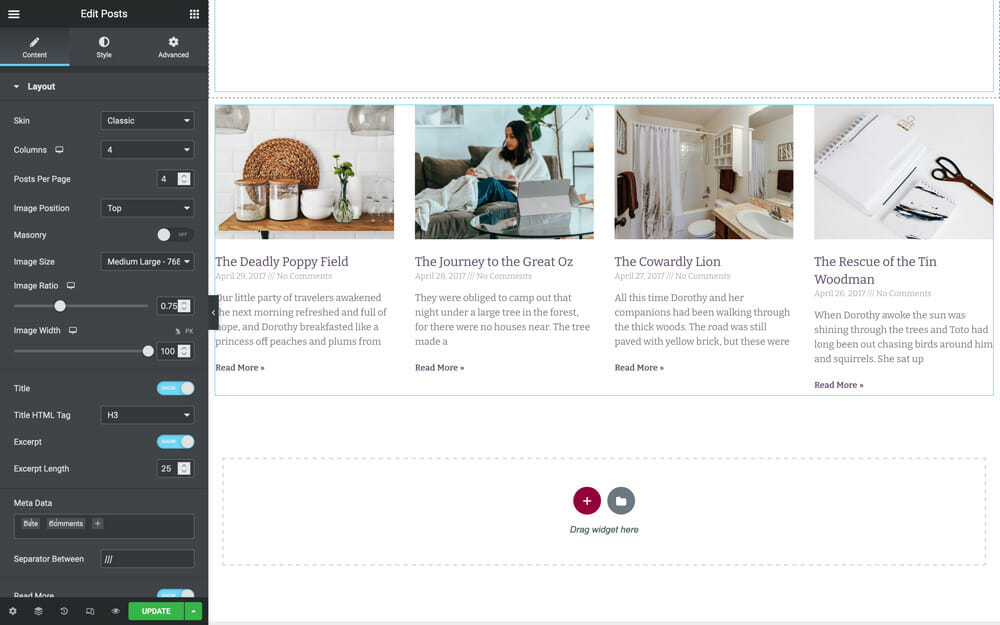
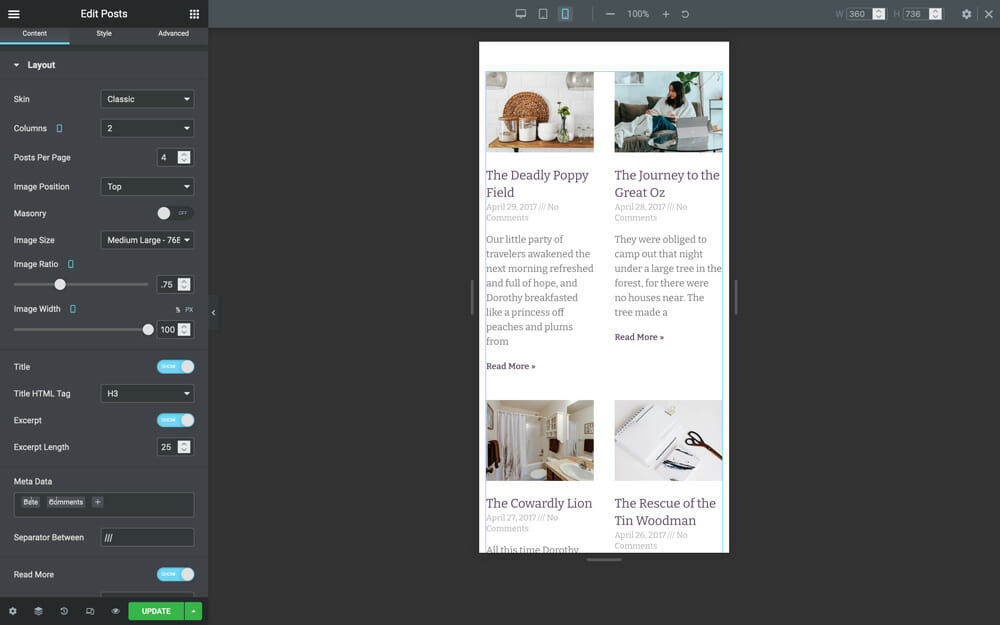
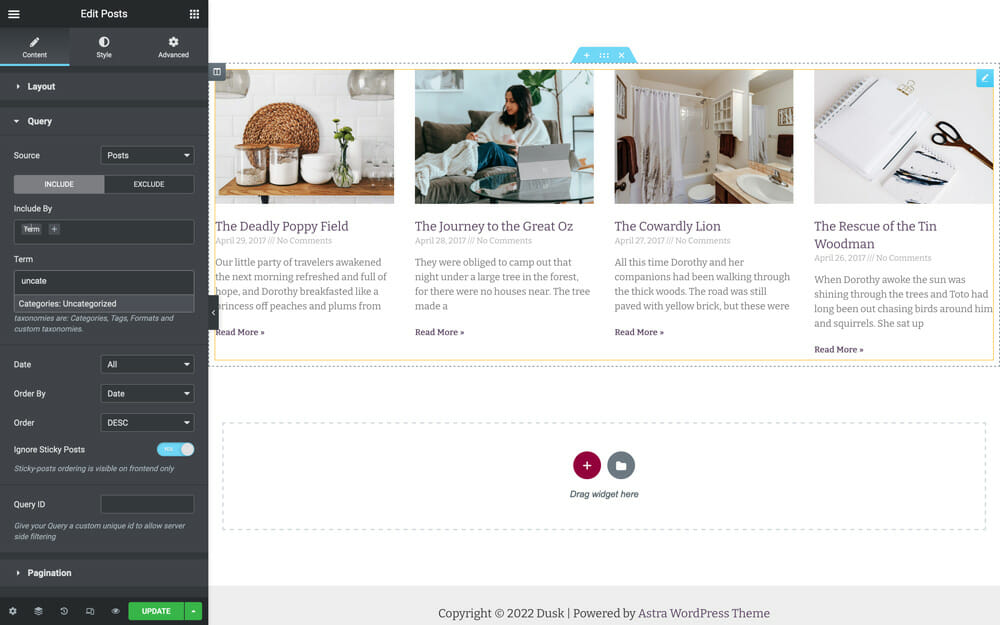
Placing Posts in a Page
To embed blog posts in web pages across your site to drive interaction with your users, you can insert the ‘Posts’ widget. Here, you can set your display settings for desktop, tablet, and mobile to ensure that your posts look great on multiple display sizes!
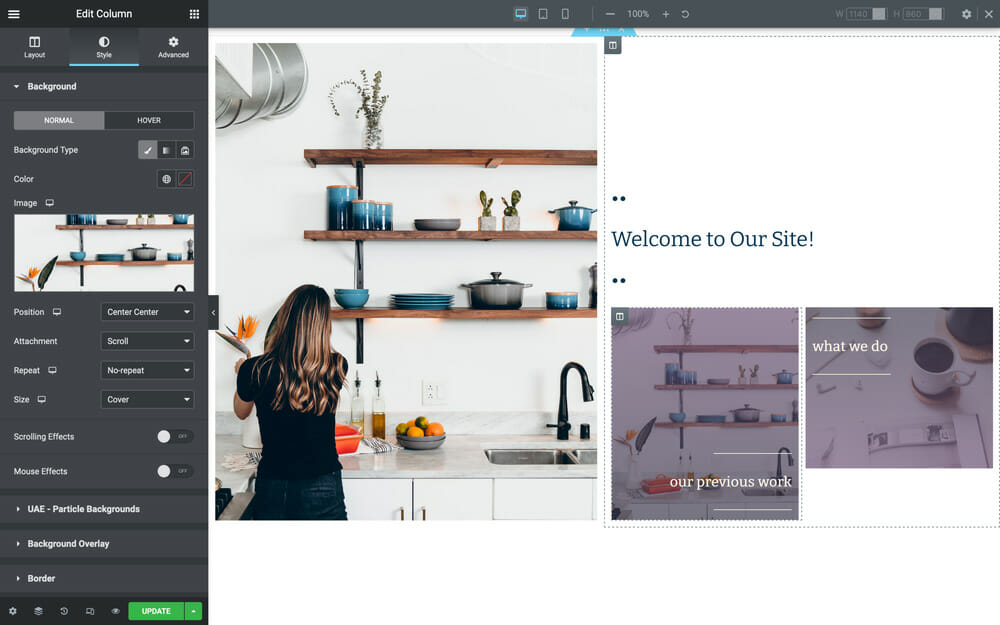
Using Background Images
Similar to using a background color on a section, you can use background images as well! To set a background image, select a section or column, then use the Style tab to select your image, set the image size (a size of ‘cover’ is recommended unless using a pattern), set the image position, and choose either a fixed or scroll attachment style so that the image either stays in place or has a scrolling effect!
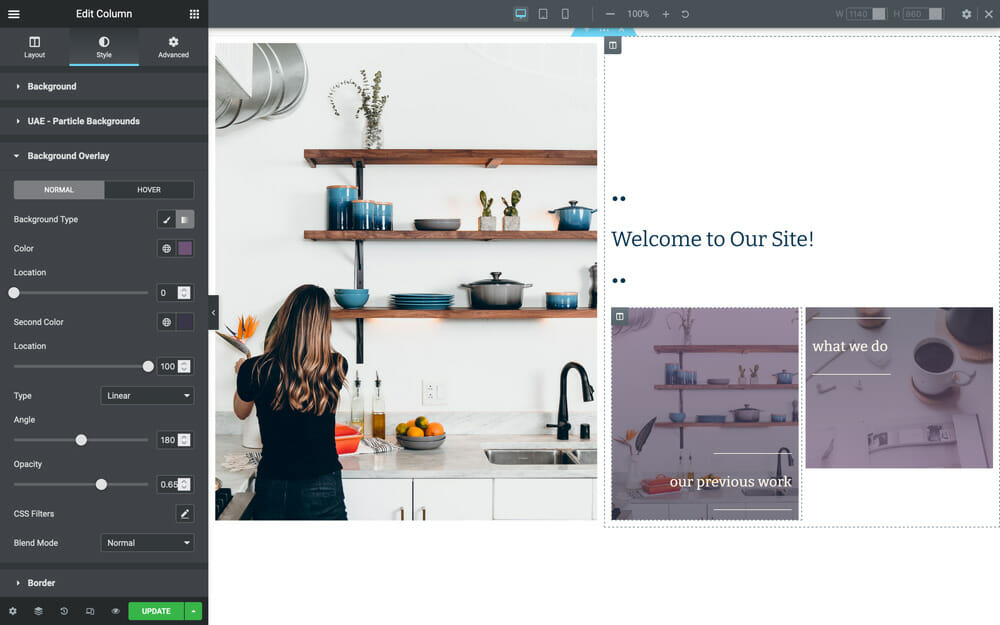
Using Background Overlays to Improve Text Legibility
If you’re putting text over an image background, chances are, you’ll need to use a background overlay. This overlays a color on the image so that your text is more legible and the user doesn’t have to strain to read your content! This can be done in the Style tab below the background image section. You can use either another image or a color/gradient as the background overlay, then set the overlay’s opacity!
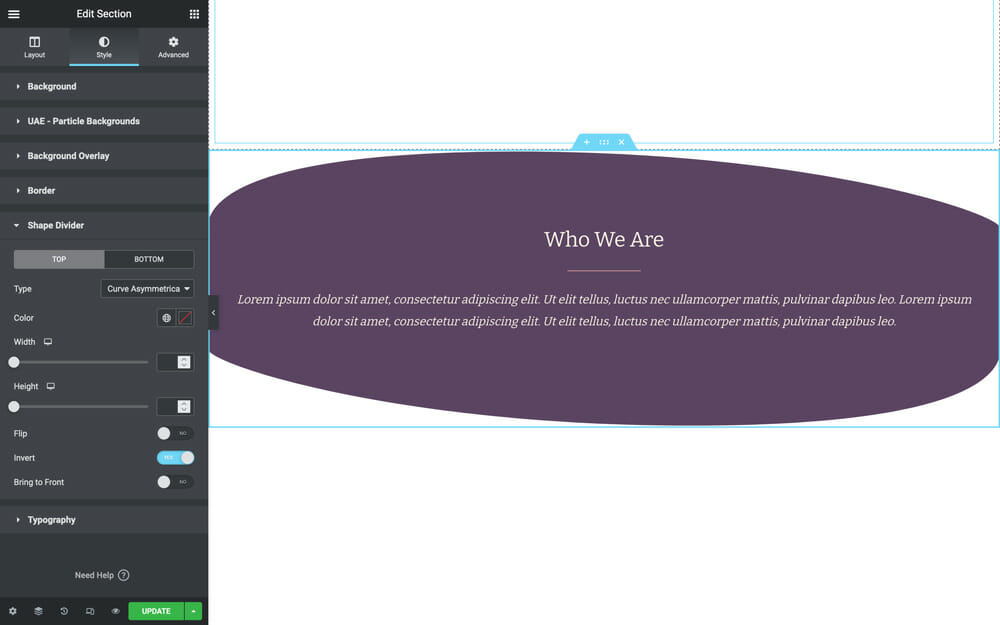
Creating Visual Interest With SVG Effects
SVGs are fantastic for creating beautiful visual effects and drawing the user’s eye (it makes your site design seem extra professional too)!
Elementor’s shape dividers are perfect for this! There are a number of SVG shapes that you can use to make your sections pop with fun shapes, taking your website design to the next level.
Elementor Templates and Global Widgets
Creating and Using an Elementor Template
Elementor templates make it so much easier to use Elementor! If you have a page layout that you would like to use for multiple pages, a section that you want to include on multiple pages, or you’re just stumped on what layout to use for your pages, templates are your best friend! There are even more templates available in Elementor Pro!
Creating Templates to Use Again
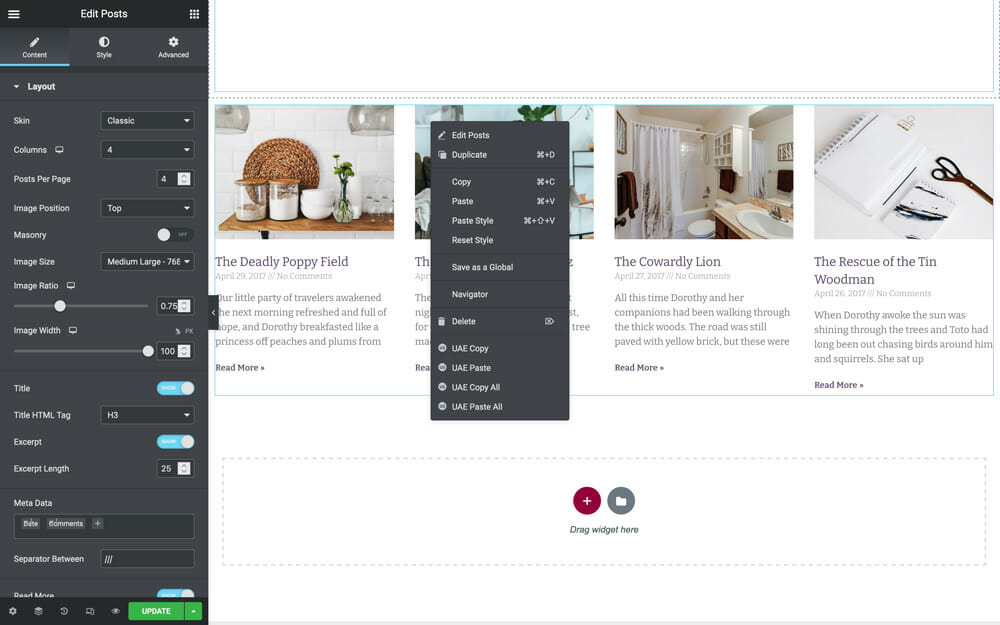
To create a template of a section, right click on the section, choose the ‘Create Template’ button from the dropdown, and enter a name for the template. Your new template will be saved into your Elementor Template Library! If you’re a web designer & you create a template that you know would be easily adapted on other client sites, this can save you a ton of time!
Creating templates of your entire page is just as easy! In the bottom left, click the arrow icon beside the ‘Update’ button. Here, you will see a ‘Create Template’ button. Simply click ‘create template’, input the template name, then view your page’s template in the template library!
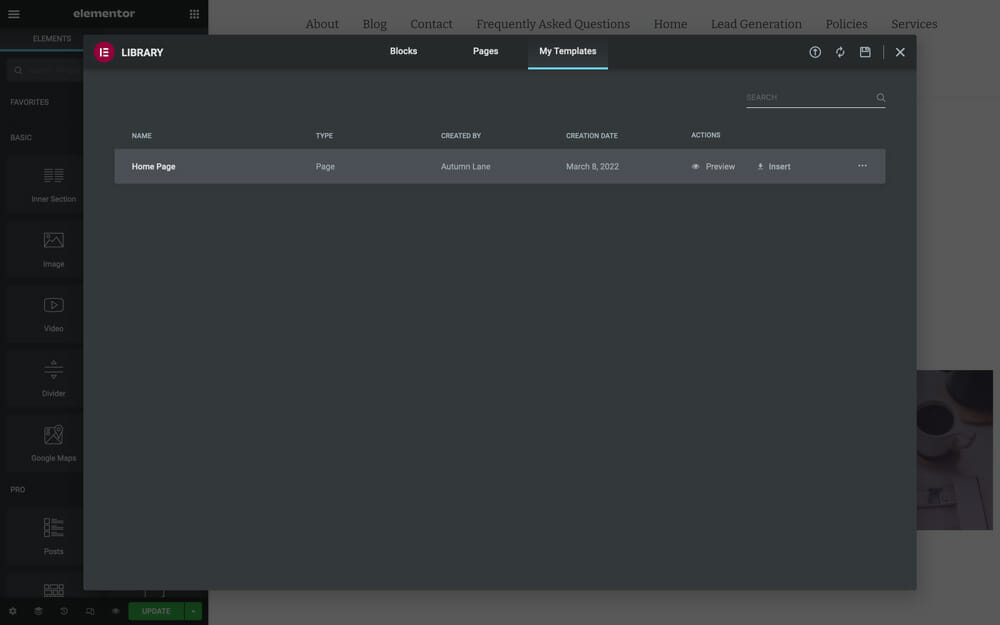
Placing Elementor Templates on Your Web Page
To place an Elementor template on your page, whether it is a full page design or a page section, open the Elementor page builder on the page that you plan to place the template. Here, you will see a folder icon at the bottom of the editor. When you click on this, you will see the default template library with premade templates for Elementor, free for you to use, as well as a tab labeled My Templates. Whatever template you choose to place, you can hover over it, choose ‘Insert’, and see the template populate on your page! Then, you can edit the content as needed or leave it as-is.
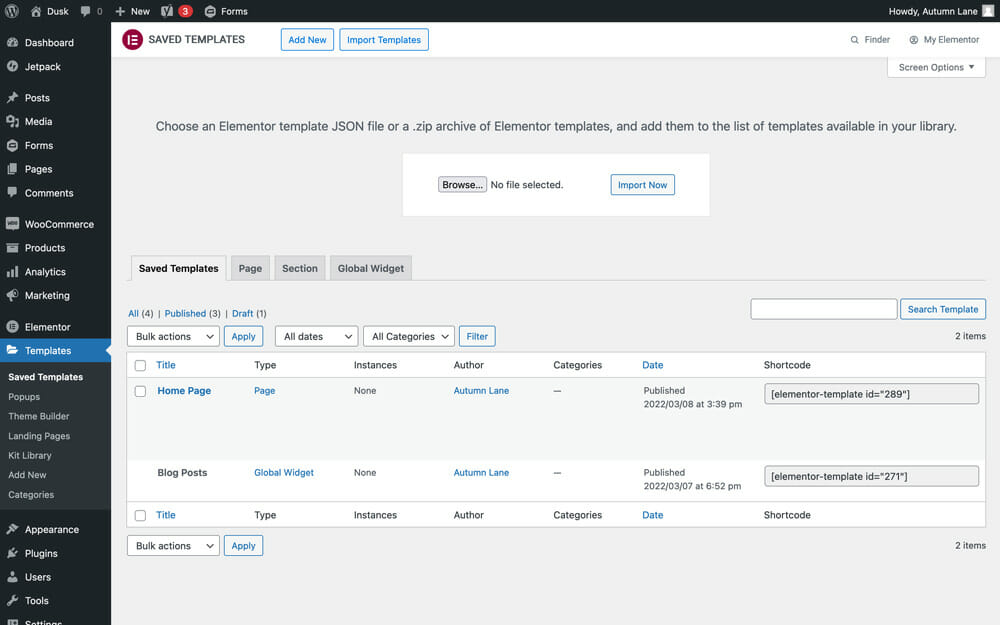
Import Elementor Templates
If you’ve purchased an Elementor template or exported a template from another site, you will need to import it to your template library before you will be able to use it. To import a template into your template library, navigate to Templates in the WordPress dashboard. Here, you will see an ‘import’ button, where you can select the file from your computer and import the template directly to your template library!
Using Global Widgets
Global widgets are perfect for when you have a customized widget that you would like to use on multiple pages. This way, you don’t need to set all of the individual settings for the widget on each and every page that you create!
To create a global widget, right click on the widget and select ‘Save as a global’. This will save the widget as a global widget which you can choose to insert on a page the same as any other widget, from the Global tab of your left-hand sidebar.
Using the Elementor Popup Builder
Templates aren’t just for sections within pages! You can build popup designs directly in your Elementor library and drive interactions with your users. If you have a mailing list that users can sign up for, a product you’re featuring, or an even for users to book, the popups are perfect for you.
This is super easy for integrating embedded mailing list opt-ins! If you embed an opt-in for your newsletter, whenever the user inputs the information for the opt-in, they will be redirected accordingly or automatically added to your mailing list, depending on the settings!
Creating a Popup
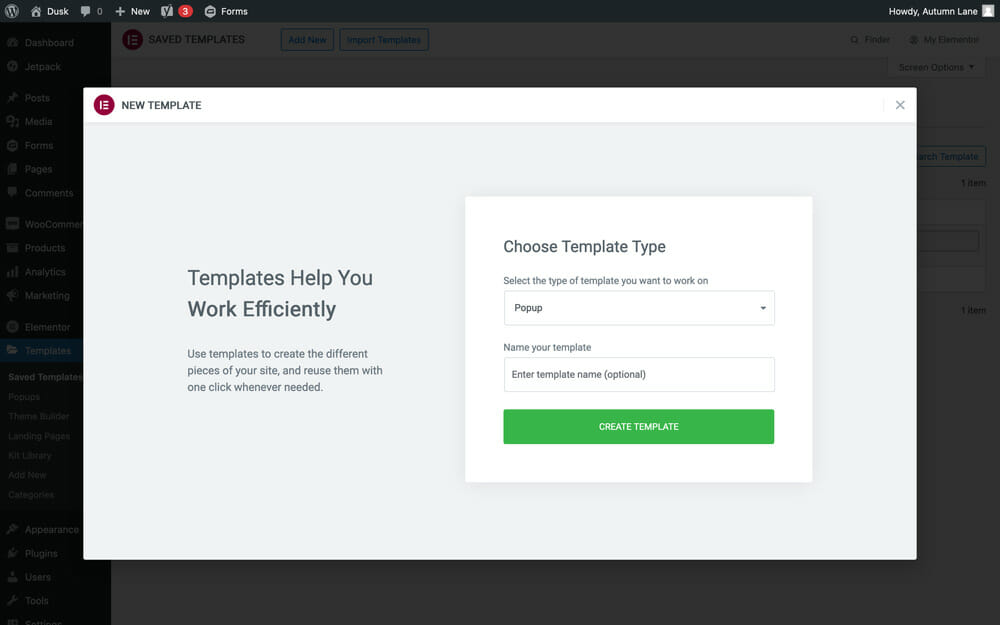
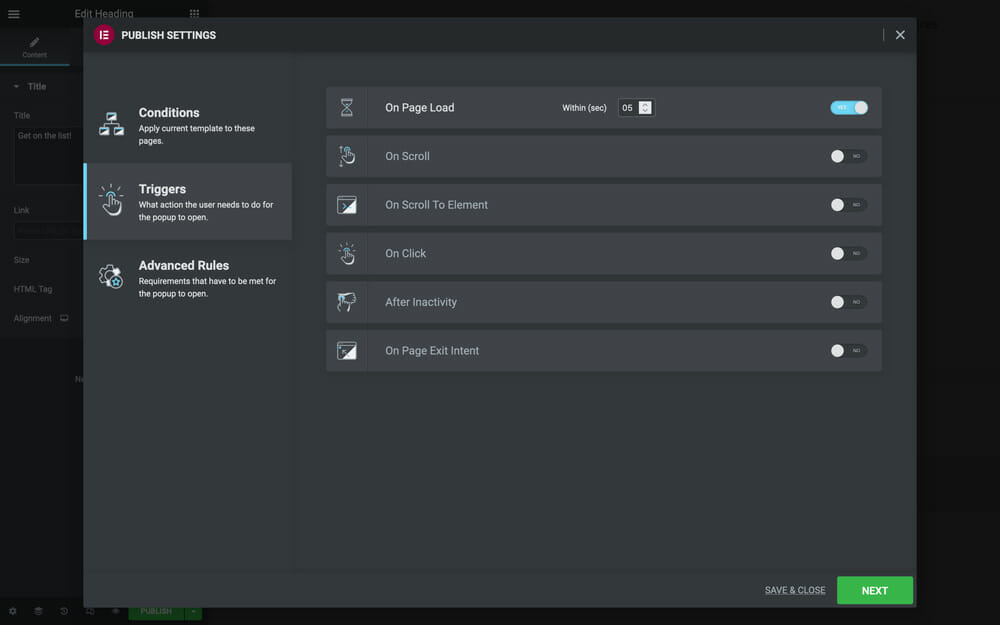
From your WordPress dashboard, you can navigate to Templates, then click ‘Add New’ and select ‘Popup’ from the dropdown. Once the editor opens, you can put your design in place! From here, you can control the display conditions (where the popup will display, how often it will pop up, etc.) when you publish your design!
Go forth and create amazing website designs!
Streamline your website design process with Elementor. Now that you know how to use Elementor to elevate your page designs, you can create designs that you may have never imagined making yourself. The best part is that everything is super easy to edit and update as your business changes and grow!